The best way to get a feel for the app is to look through a few examples of how you might use it, so let's go...
...but before we do, whether you have SightSet on iOS or Android, you'll find step-by-step Hints that pop up to guide you through the process depending on what screen you are on and what you are doing. (And because pop-ups can get super annoying, you can turn them on or off on the Settings screen whenever you want.)
OK. So now we're ready, just follow these three simple steps:
By default SightSet will already be set up to use US/imperial measurements, so if that's what you want, you can skip this step.
All of the screens where measurement is involved allow you to choose a metric option if you would prefer. It can get a bit tedious having to remember to set it each time, however, so why not just have metric all the time?
Exactly! Here's how...
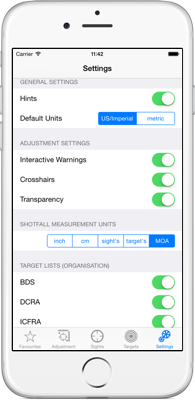
On iOS, tap on the button for the Settings screen, and tap the buttons to set the relevant defaults to metric. SightSet will remember your settings until you change them again.
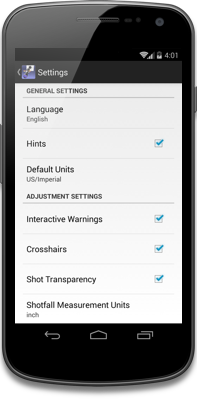
On Android, you'll need to select Settings1 from the Overflow menu.
The Default Units item is in the GENERAL SETTINGS section. Tap on the item to bring up a dialog where you can change the selection.
1On iPhone or iPad, use the built-in facilities in iOS to change the in-app Language to English, French or German.
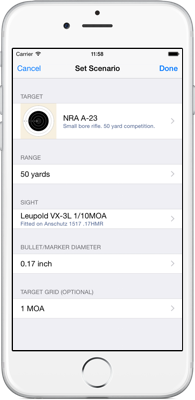
Before SightSet can do its stuff, you need to tell it:
You do all of that on the Set Scenario screen.
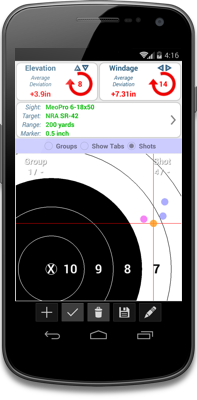
Flip to the Adjustment screen, then simply plot your shots on a representation of your target each time you fire. SightSet will average the shots as you take them, and update recommended adjustment for your sight. And so you can see progress, the last shot you take is always plotted in a contrasting color.
If you make any mistakes or need to remove shots, that's no problem. Just enter edit mode, use the video controls
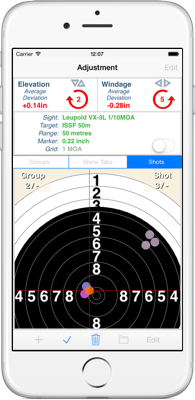
to move backward and forward through your shots to locate those that you don't want and drop them in the trash. SightSet will recalculate the adjustments needed.
And if you can't quite see what you are doing, need finer control, or hit the target but missed the scoring rings by a mile...
You can pinch to zoom in or out (with a simple double-tap to reset).
As soon as you get a bit more familiar with SightSet, you can make your life even simpler. You can create your own sight entries and tag them with the gun that they are attached to. If there are simple targets that you need that we don't provide, you can create your own. If there are targets that we provide that you don't need, you can simply switch them off.
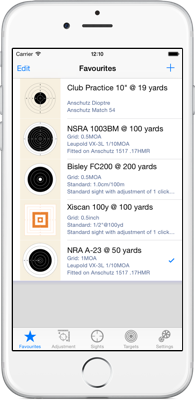
And if you are using SightSet regularly, from the Favorites screen, you can set up all of the configurations of sights, targets and ranges that you use. Select the Favorite that you want to use and you're ready to go!
There's far too much in SightSet to cover in detail here. So, if you're interested in SightSet, or want to see what's new in the latest version, why not check out the FAQ section? There are also a host of tutorial videos that cover everything about SightSet.